User Manual
The WebKIDSS Online Program Manual is designed for providers and professionals using the WebKIDSS system. By clicking on the various sections of the Table of Contents, you will be taken to the selected section within the manual.
While we make every effort to maintain the accuracy of this manual, please understand that you may come across outdated information from time to time. If this occurs, please email us to make us aware that an update is needed, and we will promptly begin the process of updating to reflect current information.
As always, we advise you to use this manual as a guide when using the IEP system. Each agency has its own guidelines, based upon preferences. We advise that you always follow the instructions given to you by your agency.
Browser Buttons, Closing Windows, Logging Out
Browser Buttons
- The use of browser buttons, with the notable exception of Print, is not allowed in WebKIDSS. This includes the Back, Forward, and Refresh buttons. Use of the browser menu items and keyboard equivalents of any browser buttons, except the print function, is also not allowed.
- Each web page displayed by WebKIDSS has specific, contextual information that can only be processed once by the program for security purposes. For example, if the Back button is used, this would cause WebKIDSS to try to process the context information a second time. At that point, however, that context information would no longer be valid, and WebKIDSS would issue an error.
Closing Windows:
- Do not use the close box (i.e. the “x”) in the title bar at the top of a window to close the window.
- Most WebKIDSS functions are exited using a "Done", "Cancel", “Finished”, or "OK", or “End” button.
Logging Out:
- Click on the "WebKIDSS Logoff" button to exit WebKIDSS.
- If you do not log off properly, your browser may still be connected to the WebKIDSS program and subject to use by unauthorized personnel.
Dashboard/Main Menu
Timer
Appears in the top, right corner of the screen and shows how much time remains before the system automatically times out. If you do not click “save” prior to the time running out, data entered, but not saved, will be lost. This is in place for security purposes. To reset the clock to 29:59, click on save, next page, next student, etc. to keep your session active.
User Functions
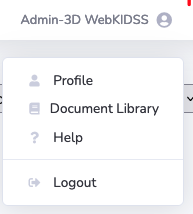
Appears in the top section on the right side of the screen. This displays your Web User Name with an icon of a person next to it. Clicking on this provides access to the following options: Profile, Document Library (if enabled), Help, and Logout.
- Profile - allows you to change your password and update your user information such as email address (as permitted) and your personal address book.
- Document Library- allows you to access documents that your agency has made available for you to view, download, and print.
- Help- gives access to the WebKIDSS User Manual (this manual).
- Logout- logs you out from the WebKIDSS database.
Main Menu Selectors

Group
Used to select your group access type (based on permissions); you may be assigned to more than 1 group; each group has its own set of permissions and functions.
Status
Used to select student type by status (archived, non-archived, both, and demo students).
Select Students
Used to select student records by type (IEP, 504, ELL, and GEI/SIT/MTSS). Groups may have access to multiple record types. Each type may or may not be utilized within an agency's database.
Which IEP Records
Active and Draft - This is the default setting for Provider groups. Students accessed under this choice will include any student that has an Active Status Code or a Draft IEP record with the user listed as a provider for the current date.
Current Active Caseload - This choice provides access to non-Draft (Completed) student records where the student has an active status code and a service line with the provider listed covering the current date.
Active During Current School Year - This choice gives access to any student with an Active Status code where the provider is listed at any time during the current School Year.
Inactive During Current School Year - This choice gives access to any student with an Inactive Status code where the provider is listed at any time during the current School Year.
Top-most Two Records - This choice gives the provider access to student records where they are listed as a provider on at least one of the top two records for the student. Status, dates, etc. do not factor into this.
No IEP - This selection gives providers access to students who are in process. Meaning they do not have an IEP date, rather they have a 00/00/0000 record, a No IEP record. Students in this category are generally in the process of transferring in to the agency or are under the initial evaluation process.
Draft Records Only - This choice gives access to providers where they are listed on a service line for the current date AND the IEP record is in Draft status. Any student without a Draft IEP record will not be included in this selection.
Dashboard Report
Student Dashboard
The student dashboard gives you access to your current logon group students. Using the Student Dashboard, you are able to quickly locate information on your access by typing search criteria into the search field and pressing “enter”. You are also able to sort your student dashboard and print the results and/or copy them to an excel spreadsheet. The student dashboard is updated each night (or at admin choice), so changes made during the day may not be reflected until the following day.
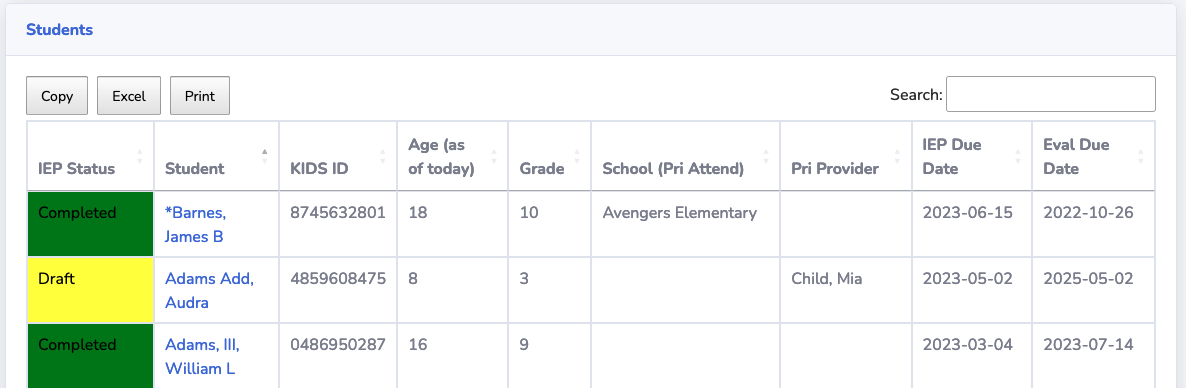
- IEP Status- displays the current status of the IEP record as either “Draft”, “Complete”, “Overdue”, or "In Process".
- Student- displays the student name; clicking on a student name takes you directly to the student’s record.
- KIDS ID- displays KIDS ID# for each student; any blank IDs may be a result of a student who has not yet been assigned an ID (in process) or an indicator/reminder that a KIDS ID# needs entered on the demographics screen.
- Age (as of today)- displays student’s age as of today (updated nightly)
- Grade- displays student’s grade level on the current IEP
- School (Pri Attend)- displays the student’s primary attendance building (assigned on the Anticipated Services Chart)
- Pri Provider- displays the primary provider for the student (assigned on the Anticipated Services Chart)
- IEP Due Date- displays the date the annual IEP must be held to avoid being overdue
- Eval Due Date- displays the date the evaluation/reevaluation must be completed or waived to avoid being overdue
Each of these table headers can be sorted by A-Z or Z-A by clicking on the triangles next to each header.
The data in the Student Dashboard table can be copied to a clipboard, exported to excel, or printed by choosing your option to Copy, Excel, or Print. If you have sorted data or searched for specific data, it will be the data that is used. To copy or export all of the data on the Student Dashboard, do not add filters or search criteria. This function will copy all data displayed, even if it flows over onto another page display.
If you have more than 25 students in your Student Dashboard, you will have more than one page to view at the bottom of the table. You can toggle between pages by choosing “Next” or “Previous” or by clicking on the page number (i.e. 1, 2, 3, 4, etc.).
Main Menu Navigation
The sidebar on the lefthand side of the screen contains several functions. Your sidebar may look different than another user’s depending on the permissions you have been granted by your agency. Clicking the arrow at the bottom of the sidebar will shrink the sidebar down to icons. It can be reopened by clicking the arrow again.
Students
- Edit Students - takes you to your current caseload where you can edit IEP records, create new IEP records, etc. When finished accessing this function, click on the “Done” button to be redirected back to the Student Dashboard.
- Locate a Student - allows you to search for a student by name, birthdate, ID/SS#, and/or KIDS ID#; to go back to the Student Dashboard, click “Cancel”
- Meeting View - allows you to search for a student by name or KIDS ID#; this can be used when displaying/editing the IEP during a meeting to ensure no other student names are inadvertently disclosed; to go back to the Student Dashboard, click “Cancel”
- Create a New Student - if you have permission to create a new student, you will complete the required fields on this screen and follow the prompts to do so; to go back to the Student Dashboard, click “Cancel”
- Enter Progress Reports - takes you to progress report entry where you can switch between students, display for printing, and display all goals; to go back to the Student Dashboard, click “Done”
- Run Verifications - clicking this option takes you to a screen where you can “Select All Students” or “Select Individual Students”; follow the instructions on the screen to run the verification check; to go back to the Student Dashboard, click “Cancel”
Print Documents
- Print a TIP - allows you to print a Teacher Information Page (if your agency has allowed permissions to do so); follow the instructions on the screen and/or click “Cancel” to return to the Student Dashboard
- Print an IEP - Allows you to print up to 2 IEPs at a time by selecting the student(s) you want to print. Complete the selection options on the screen. From this screen, you can choose either the primary IEP or the secondary print order that is set for your agency (i.e. IEP#2). The “Print IEP(s)” icon is also available on the Student Dashboard.
- Progress Reports - allows you to print IEP progress reports for one or more students by selecting your preferences and clicking on “Print”; follow the instructions on the screen and/or click “Cancel” to return to the Student Dashboard
- IEP Form - allows you to print forms for one or more non-archived students; follow the instructions on the screen and/or click “Cancel” to return to the Student Dashboard
- Blank IEP - prints a blank IEP and gives you options of which IEP version you would like to print; follow the instructions on the screen and/or click “Cancel” to return to the Student Dashboard. Not recommended for paper format usage. Only recommended as an "emergency" back-up.
- Blank IEP Form - prints a blank IEP form that does not contain a student’s name or demographic information; follow the instructions on the screen and/or click “Cancel” to return to the Student Dashboard. Not recommended for paper format usage. Only recommended as an "emergency" back-up.
Medicaid
- Log Single - takes you to the Medicaid log entry for one student at a time and allows you to view the student’s goal(s), service chart, and building calendar.
- Log Group - takes you to the Medicaid log where you can enter for more than one student by selecting which students to include.
- Initial MedAide Records - This function is for OTs and PTs supervising a COTA/PTA. Medicaid logs are required to be initialed by the supervising provider within five calendar days of creation by the COTA/PTA.
Logon Reports
- Submitted List - if your agency is using the submission process, this will show you a list of students that have been submitted to you.
- Initial Evaluations Due - a list of students you have access to where the Initial Evaluation is coming due.
- Outstanding Drafts - a list of students that are in Draft status and the IEP Meeting Date has passed.
- ReEvals Due - a list of students you have access to where the Reevaluation is due within the next 60 days.
- Logon (No-Click) Reports - if your agency has enabled logon reports, you will access them here (i.e. Special Transportation, ESY Qualified Students, IEPs Due in next 30 days).
Reports
- Procedural Dates Report - allows you to print a report of your caseload and/or a specific selection of students that can include the annual IEP date, 3 yr reeval date, next vision, and next hearing dates; can be arranged by date, primary provider, primary attendance building, or primary attendance LEA.
- IEP Students - provides you with a list of current students and identifying information that can be sorted and copied/pasted/printed to a report based on the filters you set.
- IEP Students w/Providers - allows you to print an alpha list of IEP students with providers that includes all active and draft students.
- IEP Students for next SY - displays a list of students with services in the next school year.
- IEP One-Click Report - displays your agency’s one-click reports that have been custom-made for use (based on permissions).
Student Menu Navigation
When accessing a student record, the sidebar on the lefthand side of the screen contains several functions. Your sidebar may look different than another user’s depending on the permissions you have been granted by your agency. Clicking the arrow at the bottom of the sidebar will temporarily shrink the sidebar down to icons.The sidebar changes options once you enter a student record. Those functions are as follows:
Display/Print
- Print IEP - Save your IEP data prior to clicking “Print IEP” to ensure all information that has been entered is printed. Follow the instructions on the screen and then click “Display” to display the IEP for printing. Click “Cancel” to return to the student record.
- Print IEP #2 - Save your IEP data prior to clicking “Print IEP #2” to ensure all information that has been entered is printed. Follow the instructions on the screen and then click “Display” to display the IEP for printing. Click “Cancel” to return to the student record.
- Print TIP - Save your IEP data prior to clicking “Print TIP” to ensure all information that has been entered is printed. Follow the instructions on the screen and then click “Display” to display the TIP for printing. Click “Cancel” to return to the student record.
- Progress Report- Save your IEP data prior to clicking “Progress Report” to ensure all information that has been entered is printed. Follow the instructions on the screen and then click “Print Progress Report” to display the progress report for printing. Click “Cancel” to return to the student record.
Popup Goals
If your agency is utilizing the Goals page, the goals can be modified from this screen while also viewing the IEP student record. Be sure to click on “Save” and “Finished” to properly close the popup window. If you simply close the browser, your data will not save and you may not be able to access the Goal page until you logout.
Popup Services Chart
A limited version of the Anticipated Services Chart (ASC) can be accessed/modified from this screen while also viewing the IEP student record. Be sure to click on “Save” and “Finished” to properly close the popup window. If you simply close the browser, your data will not save and you may not be able to access the ASC until you logoff.
Popup Form
A simplified version of the Edit IEP Forms function can be accessed from this screen while also viewing the IEP student record. Be sure to click on “Save” and “Finished” to properly close the popup window. If you simply close the browser, your data will not save.
Sticky Note
Select this to leave a "sticky" note for yourself or someone else. Enter a note by clicking in the field and typing. To erase a message, select "Notes" and then highlight the entry and click "Delete". The yellow icon indicates that this student has a "Sticky Note". Click on "Notes" to view the message. To exit the "Notes" click on "Cancel" or "OK".
Utilities
- Change Log - This is a permission based tool. It displays the change log for this specific student record. You can sort the values by date/time, and you have the option to print the log. When finished, you should click “Close” instead of just closing your browser.
- Verifications - This displays a list of verifications (potential errors) within this specific record. Once you correct a verification, you can click on this again to see if it was cleared/corrected. Once you finish using this feature, click on the “Close” button. You are also able to print this report; if necessary.This function may run automatically when you print the IEP and/or IEP#2. *Some verifications are allowed to be overlooked, please check with your local WebKIDSS Administrator for specifics.
- Student Messages - A permission based function. This allows the user to add a student message or individual record message depending on if you want it to show up on every entry screen or just the "IEP" for the student. When finished, click on the “Cancel” or “OK” button depending on whether or not you have made changes that you wish to save. This message does not print anywhere, but will show for all users that have access/permission to view.
References
The References menu will contain up to four possible functions based on the page you are accessing.
- Standards/Common Core/CCRS - This function will show when accessing the Goal page. It is a link to the State Standards information provided by your agency. most commonly this is a series of links to the State Standards pages of the KSDE website.
- Calendars - This function will display any calendars associated with the student based on buildings and school years identified on either the Dates/Ed Status page OR the Anticipated Services Chart. Users may review details (days in session, start dates, etc.) about the calendars provided.
- Buildings - This function will display the building information for all buildings associated with the student's service lines. Building info includes Class Minutes per day, Building Minutes per day, and allowable settings. The data is split into three categories for each building, Grades 1-12, KG, and Preschool.
- Service and Setting Codes - This function will display your agency's allowable service codes and descriptions. It also will provide the user with the allowable setting codes and the descriptions. These are defaulted to the State definitions but may be updated by any/all agencies as desired/needed.